Loopi devlog
Context
About a month before the jam, I was talking with a colleague about a previous game jam and the upcoming one I was planning to join. He offered to team up with me—he would handle the artistic aspects while I focused on coding. I had almost always participated in game jams solo, but this was a great opportunity to work on a more ambitious project.
In this devlog, I'll go over our thought process, the main challenges we faced, and the solutions that led us to create Loopi. Make sure you've played the game first! (Or watched the gameplay video on the itch page).

Brainstorming
The theme, "Breaking the Loop," immediately caught my attention because it suggested the idea of disrupting player expectations, forcing them to rethink their strategies. In my opinion, a good interpretation of the theme needed to meet the following criteria:
- The presence of an actual loop, of course.
- The player must be required to use the very elements causing the loop in order to progress.
- The concept should have enough potential to be fun (and, ideally, win the jam!).
Additionally, since we were a team of two developers, we needed an idea that focused more on gameplay rather than narrative or aesthetics.
Several ideas came to mind. By the end of the first weekend, we had the following concepts:
- A platformer where the character is stuck in a movement loop and must figure out how to break free. Inspired by the Geometry Dash level EXPERIMENT by Serponge.
- A game where a herd of creatures moves in loops between several points, and the player must block their movement using limited resources.
- A racing game where the goal is to escape the track rather than just win the race.
Even with multiple ideas, it was difficult to envision engaging gameplay loops or level designs that would work well. So, we decided to keep brainstorming.
I wanted to create a game that was visually striking, and both my teammate and I were eager to experiment with shaders. With this new goal in mind, I started looking for ideas that could incorporate fractals or recursive patterns.
One of my main inspirations was Patrick's Parabox, a Sokoban-style puzzle game where players manipulate level blocks that can also contain the level itself. I wanted to revisit this concept but with a twist: in our game, each level would be its own self-contained loop, and breaking that loop would allow the player to progress. I also found the idea of nesting all levels within a single, continuous scene intriguing, allowing for seamless and fluid transitions between levels.
Mechanics & Game Design
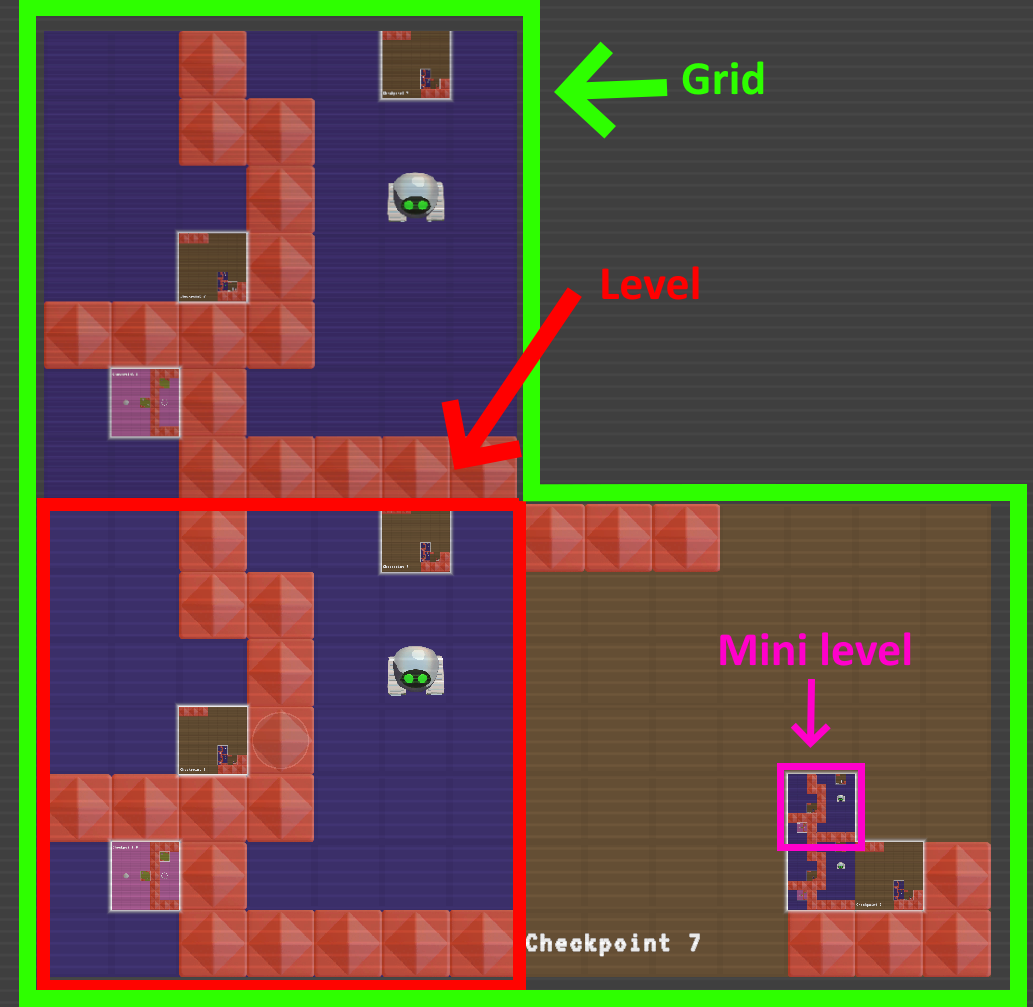
From this point on, I'll use the following terminology:
- "Level" refers to a 7x7 grid where the player can move and interact with objects.
- "Mini-level" refers to pushable blocks that the player can jump into.
- "Grid" refers to the collection of currently connected levels.
The game features classic Sokoban mechanics:
- Pushable crates and walls
- Movable objects that must be placed in specific spots to unlock the next checkpoint (we call these the "key" and "receptacle").
The way we envisioned jumping into a mini-level required the levels to have an odd-numbered width and height. The grid couldn't be too large, as the player needed to clearly see details within mini-levels. We settled on a 7x7 tile size for each level.
Unlike Patrick’s Parabox, the player cannot backtrack after jumping into a mini-level. This forces them to keep moving forward and use the loop mechanic strategically if they want to return to a previous state. Pushing objects into in the mini-levels is also not an option in our game. Instead, we decided to make assembling mini-levels the game's core mechanic, allowing players to be creative and explore multiple solutions for solving puzzles. As a result, we ended up with a game where both the puzzle structures and the ways to solve them are fundamentally different from Patrick’s Parabox, leading to a unique approach to puzzle-solving.
After publishing the game, we found it hilarious that players could collect almost all the mini-levels and stack them in the same room—or even solve puzzles using previous checkpoints in unintended ways!
Level Design
Loopi isn’t my first Sokoban-style game. I previously developed Dream Shift for the Acerola Jam 0. While that game had a lot of potential for complex puzzles, it suffered from mechanics that were too confusing and poorly explained. I was determined not to repeat those mistakes and instead make Loopi’s level design as intuitive as possible.
Part 1: Introducing the Mechanics
- Checkpoint 1: Introduces the looping mechanic by forcing the player to experiment and understand that each checkpoint is a loop.
- Checkpoint 2: Introduces pushable blocks.
- Checkpoint 3: Introduces the idea of using two adjacent mini-levels.
- Checkpoint 4: Introduces the key and receptacle system.
- Checkpoint 5: Requires the player to use the key and receptacle in a full puzzle.
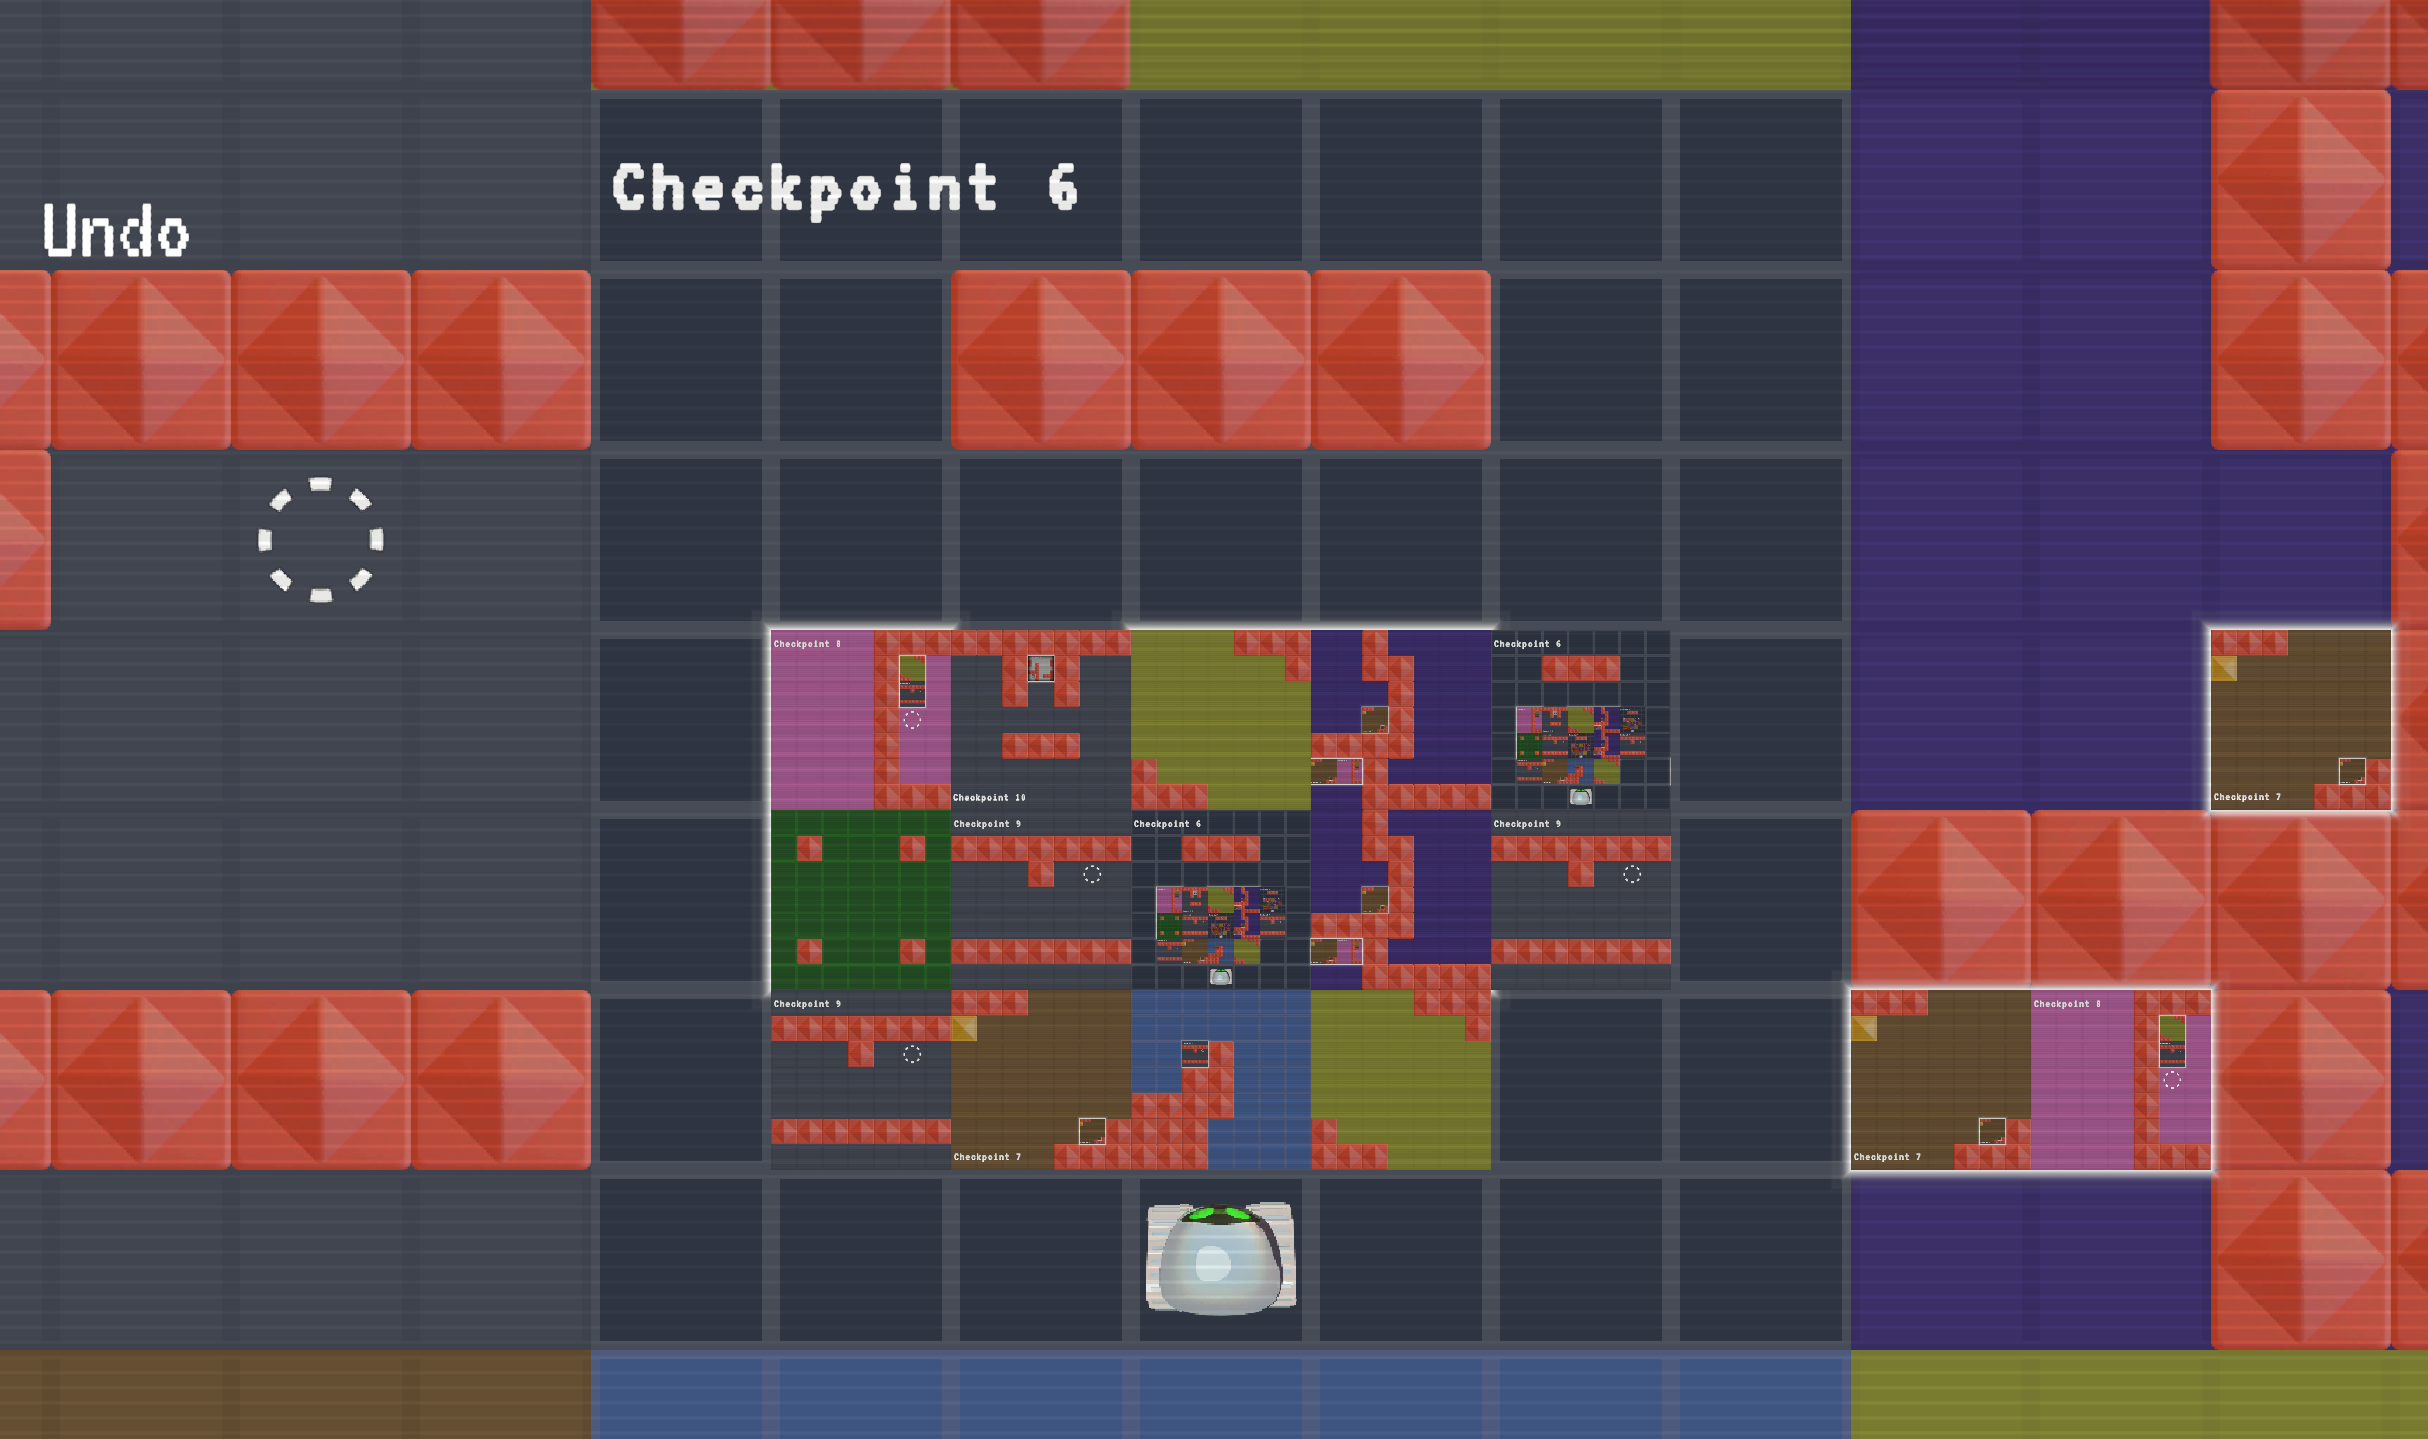
- Checkpoint 6: Teaches players how to move and assemble mini-levels.
- Checkpoints 7–9: Combine all previous mechanics for more complex puzzles.
- Checkpoint 10: Prevents players from bringing mini-levels into the next part.
Part 2: A Shift in Mechanics
At this point, I assumed that many players had already spent a lot of time solving the previous puzzles and might be looking for something fresh. That’s why the second part of the game introduces a slightly different gameplay mechanic, with easier levels to encourage players to continue until the end.
Part 3: The Grand Finale
We wanted the game to end on a visually impressive level, and this is where the fractal design I had envisioned came into play. The level design here is intentionally simple, allowing players to move through the final rooms as quickly as they want. The placement of objects and walls was also carefully designed to enhance the fractal aesthetic.
Technical Implementation
The project was developed using Unity. In this section, I'll discuss the technical solutions that made the game's core mechanics possible.
Rendering Recursive Level Copies
How can we display a copy of the current level inside itself? The solution was to use Render Textures.
Render Textures are useful because they can store the output of a camera. Each level in the game has its own camera, and recursive copies within a level are simply sprites displaying the Render Texture of the corresponding level.
However, this approach has a downside: the number of active cameras in the scene can become quite high, potentially affecting performance. To mitigate this, I implemented a system that activates the cameras of upcoming levels progressively while disabling the ones from previous levels.
Merging Mini-Levels & Generating New Play Areas
Another key challenge was merging mini-levels when multiple of them are connected and generating the next playable grid accordingly.
Let’s first focus on mini-levels. When the player decides to jump into one, the first step is to identify all connected mini-levels. I used a breadth-first search (BFS) algorithm, treating the targeted mini-level as the starting node.
However, this process is more complex than it seems because a mini-level can be connected to another mini-level inside an adjacent level—and that adjacent level could even be the same level the player is currently in!
When the player jumps into a mini-level, the game must generate a new grid composed of all the levels corresponding to the connected mini-levels. The biggest challenge here is that the new grid might contain multiple instances of the same level.
To solve this, I used a system similar to the Render Texture approach, introducing what I call "fake levels". These fake levels are the same size as regular levels but only display a Render Texture instead of being fully functional.
When generating a new grid, the game places the first instance of each level normally. However, if a second instance of the same level needs to be placed, it is replaced with a fake level instead.
To maintain optimal visual quality, whenever the player moves and enters a fake level, the game swaps its position with the corresponding real level, ensuring that the camera always renders the real level directly.
Additionally, when the player interacts with an adjacent level—whether by jumping into a mini-level, pushing an object, or checking for walls—the game always refers to the real level to process the interaction correctly.

Visuals and Animations
Level transition
To make the game's mechanics clear, it was crucial to ensure that transitions between grids were as seamless as possible. During these transitions, the entire grid scales up until the mini-level the player targeted reaches the size and position of a full level. At that point, the mini-level is hidden and replaced by the new grid.
One issue remained: the background reappeared too abruptly during the transition. To fix this, I wrote a shader that overlays a fullscreen rectangle with the same texture as the background, but with cut-out holes matching the connected mini-levels. This rectangle gradually fades in during the transition, creating a smooth effect.
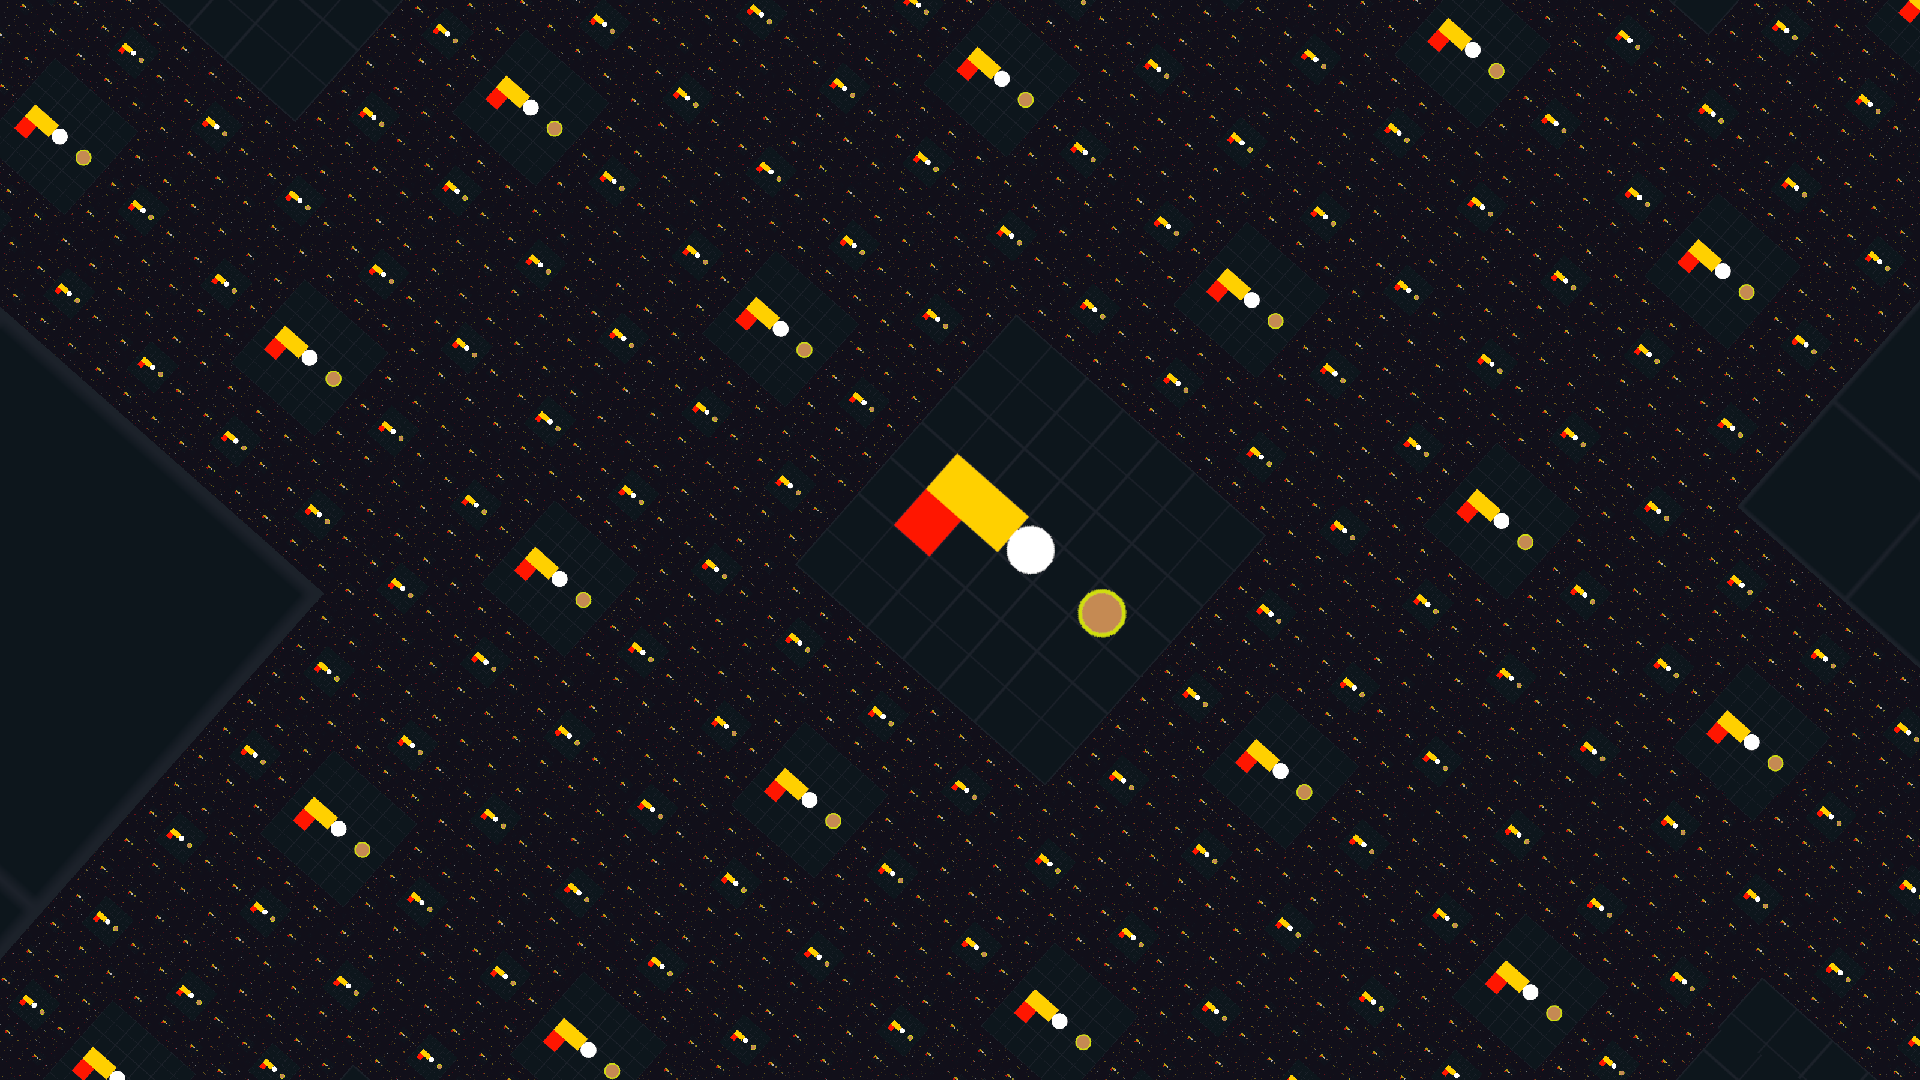
Background
Speaking of the background, we used a single material throughout the entire game, modifying only the shader properties to change colors and shapes. The shader uses Signed Distance Functions (SDFs) to represent different forms.
SDFs are mathematical functions that calculate the distance between any point in the background and a given shape (positive outside the shape, negative inside). By evaluating the function at each pixel, we determine whether it should be colored or not.
One major advantage of SDFs is that they allow for smooth interpolation between shapes, which enabled fluid transitions in the background. SDFs were also used for the outline effect around mini-levels.
Finally, a fullscreen shader effect was added to the main camera’s output, introducing subtle horizontal lines to prevent the visuals from looking too flat or uniform. This simple addition significantly altered the game’s overall aesthetic.
Texturing (written by XxDarkSwagDu28xX)
Having previously participated in several game jams as a programmer, this time I wanted to explore other creative fields by focusing on the visual aspect of the game. Since I had no particular skills in 2D graphics, I decided to capitalize on my knowledge of 3D graphics and shader creation. As a result, all the game's textures were generated from 3D renders made in Blender.
The first step was to create a playable character. During our brainstorming session, we discussed Wall-E, which ultimately became the main inspiration for our robot. Once the robot's modeling was complete, I experimented with different types of shaders:
- Cartoon shaders, which consist of only three solid colors: one for specular highlights (i.e., light reflections), one for the illuminated areas, and one for the shadows.
- Realistic (PBR) shaders, using Blender's built-in skyboxes or a manually created skybox. When working with a realistic shader, the choice of lighting is just as crucial—if not more—than the material properties. This is why we also considered Blender’s pre-integrated skyboxes, as they provide high-quality lighting setups and are quick to experiment with.
I ultimately opted for a hybrid approach, using 75% of the cartoon shader's color and 25% of the realistic shader with the manually generated skybox. This allowed us to maintain the cartoonish look that better fit the game's style while adding subtle color variations in the robot’s reflections. Next, I had to animate the character by making its wheels rotate, slightly oscillating its head, and spinning it around for the jump animation—all while ensuring the animations looped perfectly. The animations were then rendered by placing the camera at a three-quarter view from the four sides of the character and compiled into a spritesheet.
One advantage of using 3D renders instead of drawing 2D sprites by hand is that we didn't need to manually redraw the robot for each animation frame. All the details came from the 3D model and its materials, as no texture was applied to the robot. A slight touch of post-processing was added to generate horizontal lines around the eyes. Using a 3D model to generate the sprites also helped us integrate the robot into the Easter egg.
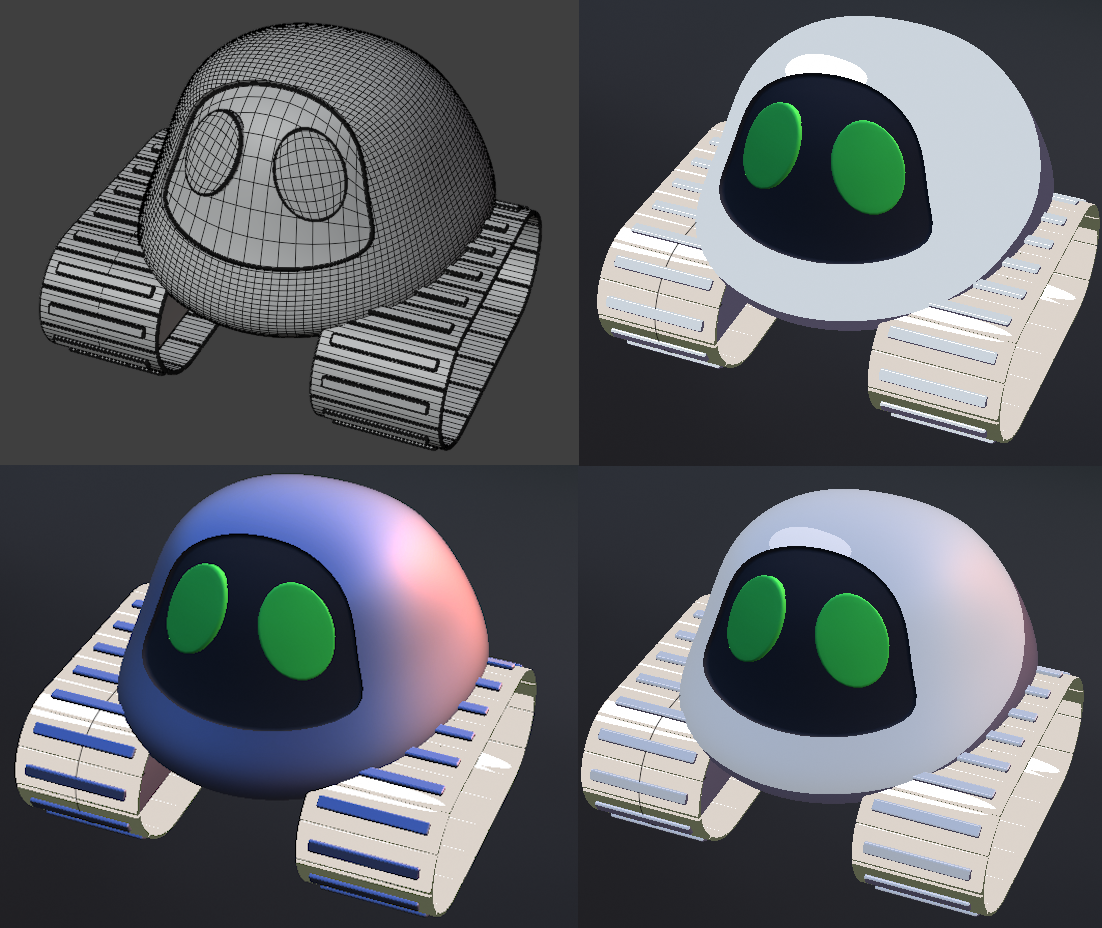
From top left to bottom right : robot without shader, robot with cartoon shader, robot with realistic shader and a premade skybox, robot with a mix of cartoon shader and realistic shader.
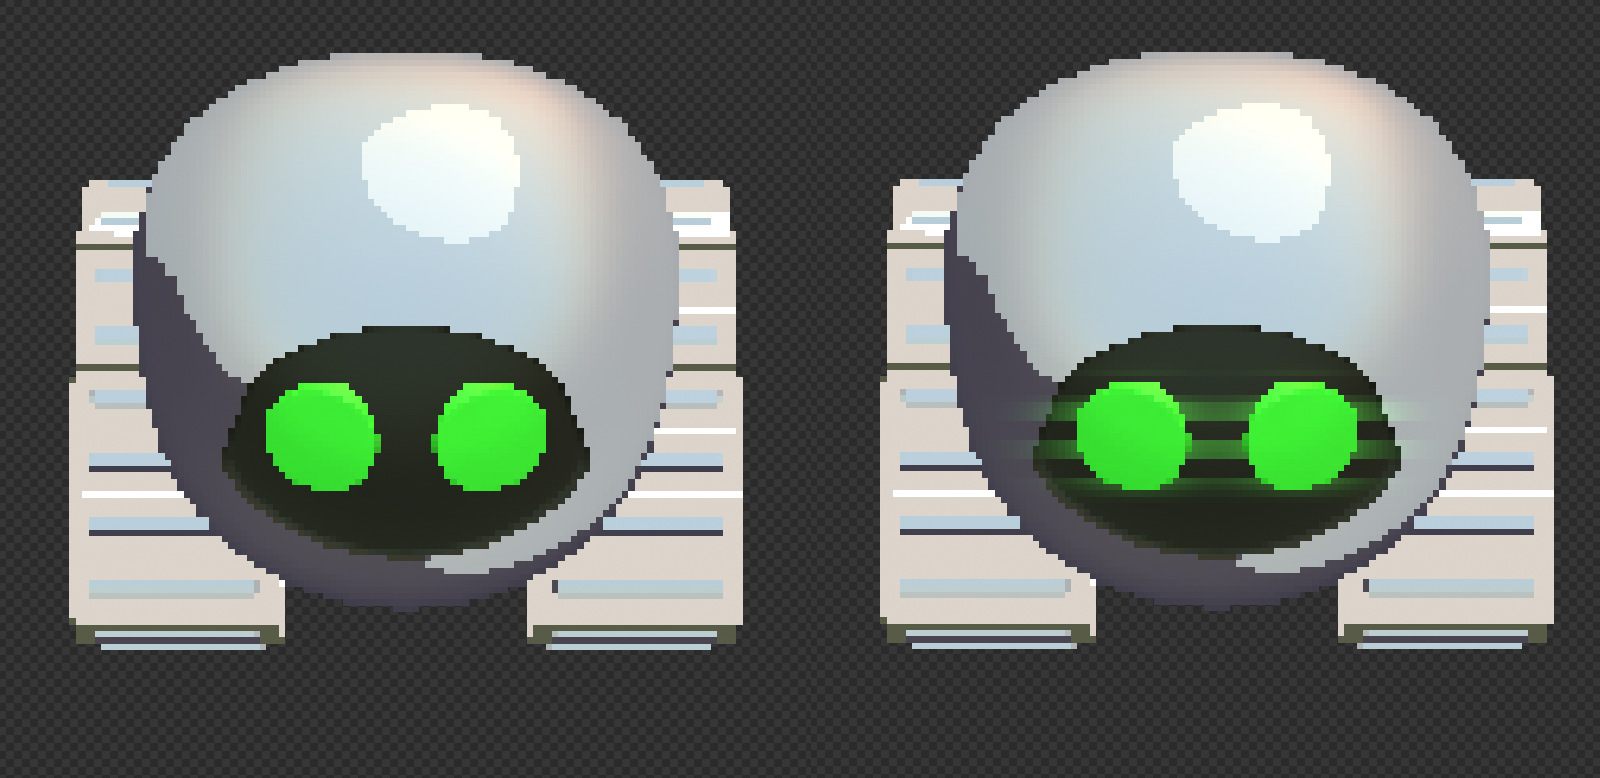
From left to right: robot without post processing, robot with post processing.
For the blocks, we tested different patterns but eventually settled on simple shapes with flat surfaces to achieve a geometric effect. These were rendered exclusively with a realistic PBR shader and a Blender-integrated sunset skybox, giving the blocks a warm tone. As for the keys and receptacles, we stayed consistent with the geometric theme by using simple shapes: circles, squares, pentagons, etc. In the end, we decided to use only the round shape in the game, as introducing multiple shapes for objects with identical functionality could have been confusing for the player.
Fractal Effect in the Final Phase
For the final section of the game, which features a fractal zoom effect, I used a shader to render a zoom on Sierpiński’s Carpet. The key twist I added was displaying the Render Texture of the current level inside each hole of the fractal.
To enhance the illusion of infinite recursion and prevent some visual artefacts, I made the holes darker as they got smaller, creating the impression of an endless sequence of levels converging toward the camera.

Audio
We chose three different music tracks to match the three phases of the game:
- A dynamic puzzle track to accompany the player’s initial discovery of the mechanics.
- A mysterious piece for the phase where the gameplay shifts and the player must adapt.
- An epic, grandiose track for the final sequence.
To add variety to sound effects, the game randomly offsets the pitch each time a sound is played. This is especially noticeable when pressing the reset button multiple times in a row.
The music and sound effects were the only artistic assets we sourced online:
- Music by Eric Matyas (www.soundimage.org)
- Sound effects from Pixabay (https://pixabay.com)
Ending & Easter Egg
For the game's ending, I wanted the character to truly break the loop, and the mechanics we had in place gave us a great opportunity to break the fourth wall. Instead of using mini-levels to display a copy of an in-game level, I wondered: what if we showed a video capture of the entire game from the Itch.io page itself?
This idea came to me when thinking about the effect you get when using a screen recording software like OBS and enabling screen capture while the recording preview is also visible—it creates an infinite recursive loop.
To give the illusion of capturing the Itch.io page, I simply took a screenshot of the page and placed it in the game. Then, in this fake Itch.io page, I replaced the usual game window with a Render Texture displaying the game itself. By zooming the camera into this fake page, it genuinely feels like something is going wrong and the game is about to break.
Once the game appears to "glitch out," it opens a new browser window displaying the message "You escaped" and the robot is now outside the original game engine!
Breaking the Fourth Wall
You may have noticed that at the start of this ending sequence, the game automatically exits fullscreen mode and disables the fullscreen button. This serves two purposes:
- It enhances the illusion of breaking the fourth wall—one playtester even wondered if the game could see the actual Itch.io page!
- It ensures that the game window remains in a 16:9 aspect ratio, since the fake Itch.io page in the game is designed for that format. If the game were fullscreen in a different ratio, the effect would be ruined.
The Technical Trick & Hidden Easter Egg
During the game jam, I discovered that it's possible to call JavaScript functions from Unity and interact with the page’s HTML using a JavaScript plugin. This is the method I used to:
- Exit fullscreen mode.
- Disable the fullscreen button.
- Open the new browser window at the end.
And this is also how I added the Easter Egg!
Once I figured out how to execute JavaScript from Unity, I thought: why not hide something in the newly opened window? If the player gets curious and clicks on the robot, the Easter Egg activates.
Since the character animations were made using a 3D model, I was able to reuse it in a small simulation powered by Three.js. I created a scene with trees, a small lake, and mountains where the character can freely move around.
It turns out… the robot has finally returned to its natural habitat!
(Wait… do robots live in nature? 🤔)
Development Timeline
- Day 1–4 Brainstorming game ideas.
- Day 5 Implemented basic nested levels using Render Textures, added an undo system and player controller.
- Day 6 Experimented with JavaScript plugins for browser interactions.
- Day 7 Finished the core gameplay mechanic, where the grid updates when the player interacts with a mini-level.
- Day 8 Experimented with fractals, created the robot animation.
- Day 9 Designed the jump animation when the robot enters a level, continued working on the Easter egg, and started level design.
- Day 10 Implemented the checkpoint system, added an animated background, mini-level outlines, completed the rest of the levels, and added sound effects.
Thank You!
Thank you for taking the time to read this devlog! This game jam was an exciting challenge, and I learned a lot throughout the process. I hope you found these insights interesting—whether you're a developer, a game jam enthusiast, or just curious about how Loopi was made. If you tried the game, I’d love to hear your thoughts!
Leave a comment
Log in with itch.io to leave a comment.